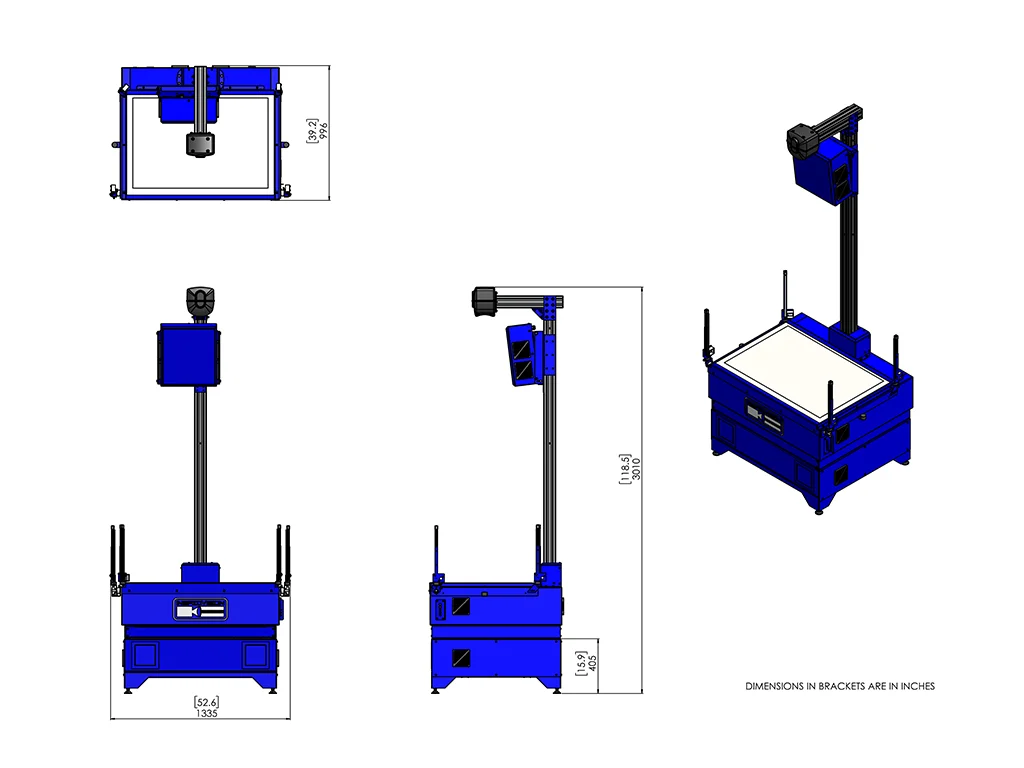
Overview / Specifications
| Description | Specification/Scope of Supply |
|---|---|
| Max component length | 1000mm |
| Max component width | 667mm |
| Max component thickness | 350mm |
| Max component weight | 50kg – UDL (Uniformly Distributed Load) |
| Measuring accuracy, length & width** | +/- 20/40 μm* |
| Measuring speed** | <0.25sec |
| Camera | Industrialised ultra high resolution professionally mounted in sealed enclosure |
| Computer processor | Intel Quad Core |
| Processor speed | >2GHz |
| Hard disk | <80Gb |
| Screen | 20 inch flat screen or better |
| Peripheral equipment | Keyboard and optical mouse |
| Operating software | Windows 10 - 64 Bit |
| Proprietary InspecVision software | Inspection, SPC, Reporting, Reverse engineering |
| Data cable | USB 2 or USB3 |
| Computer cabinet (Optional) | Industrial dust-proof enclosure |
| Light table construction | Welded Steel Enclosure |
| Light table measuring surface | Laminate glass, toughened with integral diffusion layer |
| Light source | High efficiency LEDs |
| Mast construction | Extruded aluminium |
| Power supply | 230 Volt, single phase, 50Hz or 110 Volt, single phase, 60Hz on request |
| Power consumption | 4 Amp maximum at 230 Volt, 7 Amp max at 110 Volt |
| Control panel | Control switches for power, camera and lights |
| EC directives | Compliant with Machinery, Low voltage and EMC Directives |
| Colour | Natural aluminium and RAL 5013 (cobalt blue) |
| Ambient operating conditions | 10-30 degree C |
| Approx Footprint/installed width/ depth/ height/ weight of installed Light table and Mast | 1196mm (W) x 995mm (D) x 2649mm (H) <200kgs |
| Approx Footprint/installed width/ depth/ height/weight of installed Computer Cabinet (inc keyboard tray) Optional | 587mm (W) x 900mm (D) x 1675 (H) <100kgs |
| Standard packing | Wooden crate |
| Warranty | One year limited warranty on hardware and software |
| Optional extended warranty | Two or three year extended warranty (requires software upgrade option) |
| Software support option | Annual support contract provides free software upgrades |
| DOWNLOAD THE SPECSHEET | |
*The first accuracy value specifies the accuracy achieved over most of the table,
the second accuracy value specifies the accuracy achieved at table edges
**Accuracy results are verified on standard production machines using tests based on ISO 10360
Actual measuring accuracies achieved will depend on operating environment, user input, quality and condition of materials
Errors and omissions excepted
Due to our policy of continuous improvement specifications are subject to change without notice, please contact factory or your InspecVision dealer.

