Application Example
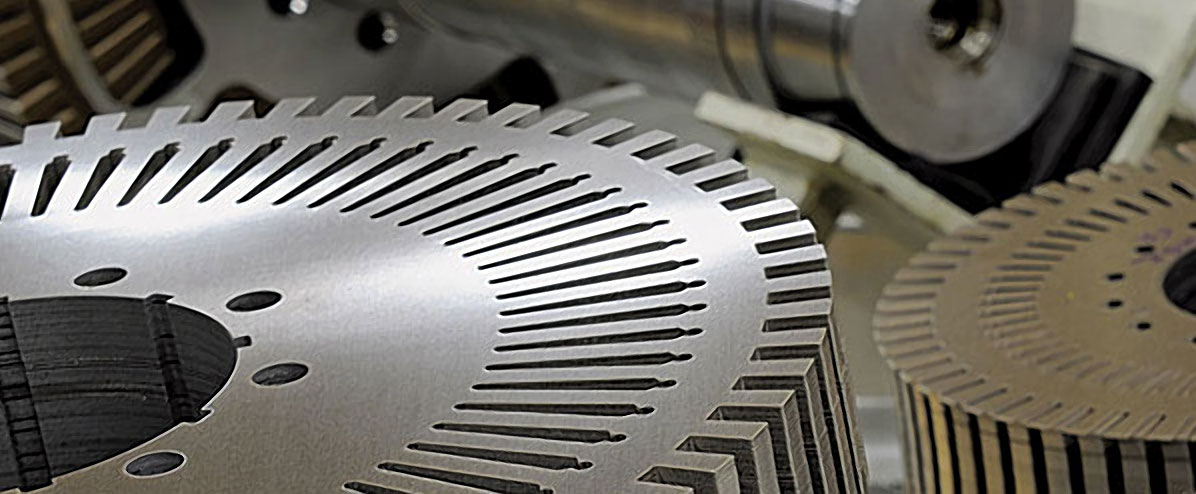
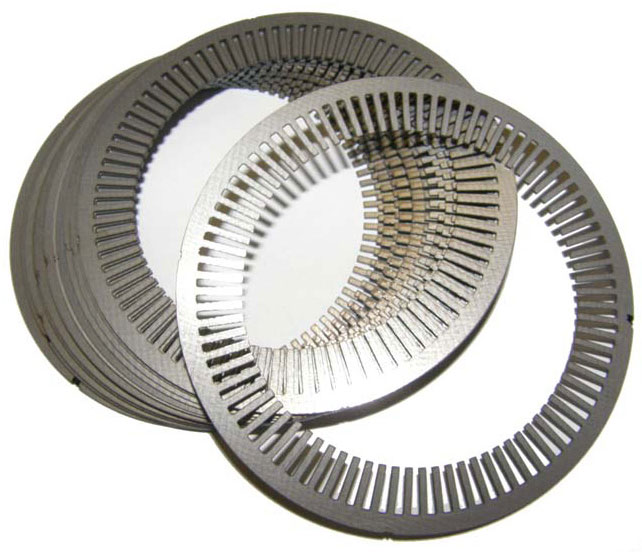
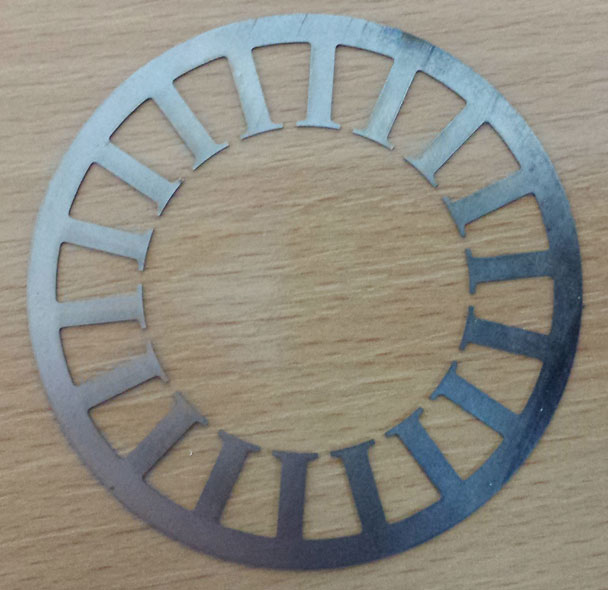
A Lamination inspection solution within the Electric Motors, Alternators and Transformer Manufacturing industries using the InspecVision Planar2D
Electric lamination inspection is a particularly difficult and demanding application to which the traditional range of metrology equipment is not well suited. Unfortunately the inspection of laminations is not optional.
Lamination Inspection Difficulties
The tolerances are quite tight and some of the reference features are quite small. The measuring machine must therefore have a very good accuracy and feature resolution.
The parts are also usually highly flexible which can make measurement of the parts on a CMM almost impossible to do accurately and conveniently.
A CMM will need a cylindrical tip to measure thin laminations. These cylindrical tips will collide with the granite table of the CMM unless the lamination is raised on blocks, however the lamination is often so flexible that raising the part on blocks will result in signi cant bending and distortion of the part. This distortion may exceed the failure tolerance of the part.
The parts may have burrs which will readily scratch any glass surface that the part is placed onto. Scratches on the glass will cause significant problems for some measurement systems which use glass tables.
There are usually a wide variety of different designs due to the requirements created by the electric fields of the product. Measuring machines which can automatically generate the required report including dimensions and tolerances from the CAD file are extremely rare. Manually defining the dimensions and tolerances can result in extremely long setup periods for each design.
Larger laminations require larger inspection machines, this can become very expensive particularly for the systems which use precision mechanisms to move the camera or probing system.
Electric laminations are typically highly symmetrical which on some systems can make alignment of the measurements to the nominal CAD file more awkward and a very manual process. These issues make the inspection of electric laminations a very challenging problem using traditional CMMs or moving camera systems.
An Automated Solution Is Needed
What is needed is an automated high speed system. The system should allow an operator to put a part on the table without jigging or fixtures. The setup and inspection should then be possible by simply double clicking a CAD file, part program or scanning a barcode.
The system should be capable of automatically importing the nominal shape, dimensions and tolerances from the CAD le to create the inspection program. The measurement process should be high speed, for example, less than one second with a few extra seconds for data processing.
Finally the entire process should ideally happen on the shop oor next to the production machine and the inspection system should be tough enough to withstand the unavoidable vibrations, scratches and occasional bumps that will follow.
The Planar2D Solution
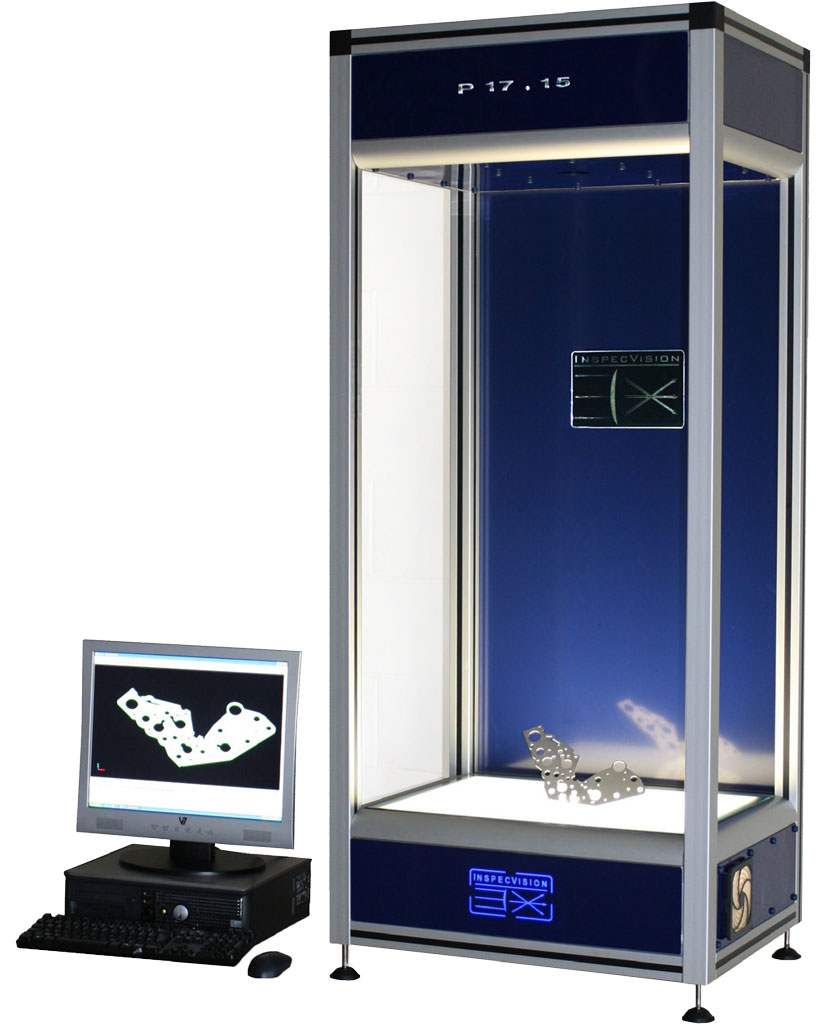
The award winning Planar inspection system is the fastest and most automated 2D inspection system in the world. The system can be used for very quickly measuring or reverse engineering parts. The system uses a backlit table and a static high resolution digital camera mounted above the table.
The Planar system is extremely automated. With a single click, or by scanning a barcode the system can complete multiple actions in a matter of seconds.
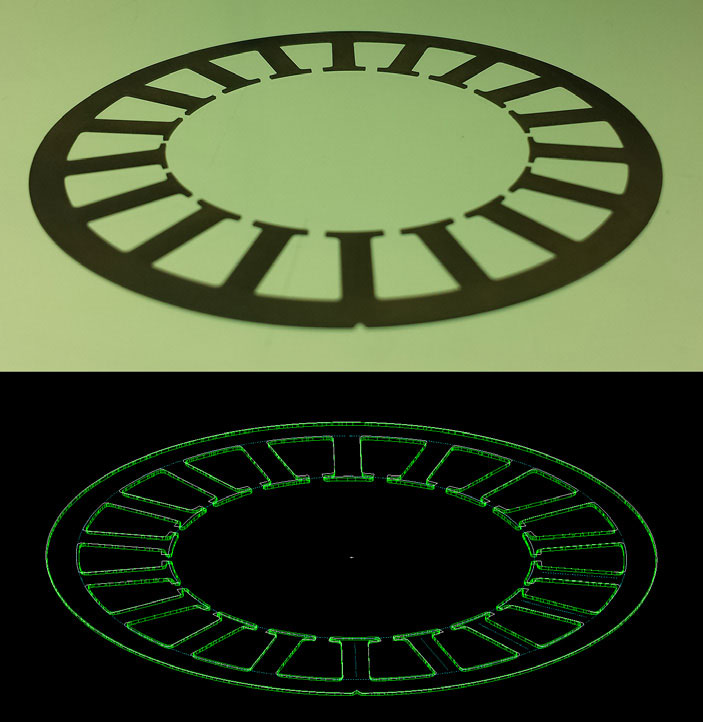
Parts are measured by placing them onto the backlit table and the camera then captures an image of the parts silhouette. This image is then converted into up to 80 million measurements which can then be automatically compared to the CAD file.
The system is non-contact and does not require any jigging or fixtures. This makes it easy to measure flexible materials. The 2D system can also compensate for parts with varying thicknesses, edge pro les and raised sections (gap to table).
The System Has Been Optimized For Inspection of Electrical Laminations
More than ten years of extensive feedback have been used to optimize the software to meet the needs of electric lamination industry. For example electric motor or alternator laminations often include large numbers of broken arcs which form a circle the diameter of which must be calculated. The Planar software can automatically identify these broken arcs and then extract a virtual circle to produce an automated inspection of the parts diameter.
Other features include the automatic alignment of parts even when they are highly symmetric, glass flattening, flatness measurement, a large variety of complex intersection options and many GD&T inspection items.
Another important requirement was to reduce setup time. Electric laminations of motors or alternators often contain highly complex geometry with PPAPs which include hundreds of inspection items. Traditional inspection systems require several hours to program and de ne the required inspection items.
The Planar system can automatically convert the dimensions and tolerances in the CAD file into a report. This can completely eliminate setup periods allowing new designs of parts to be inspected with a single click or even zero clicks.
Shop Floor Friendly Automated Inspection
As the system has no moving parts there are no wear items that need maintenance or recalibration. Furthermore the system can automatically detect when it has suffered trauma and will warn the user that recalibration is required.
The table is not affected by vibrations or scratches and cracks on its glass surface and will automatically compensates for ambient temperature. A barcode scanner can also be used to de ne the CAD le location, part tolerances, material type and thickness, the output location of the reports, alignment type and many other options.
All of these feature combine to create a flexible powerful single (or zero) click inspection system. The system can also reverse engineer 2D parts in a few seconds and is fully retro fittable with full 3D scanning options.
Planar2D Inspection Report
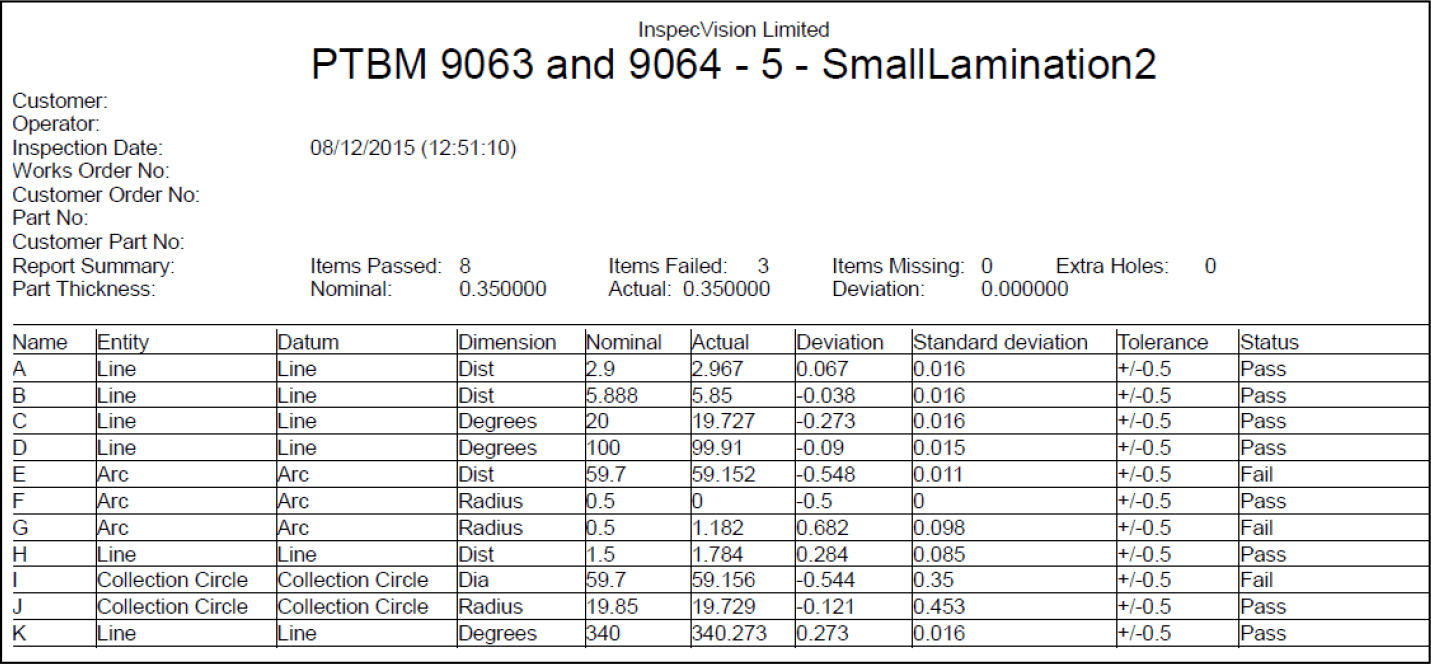
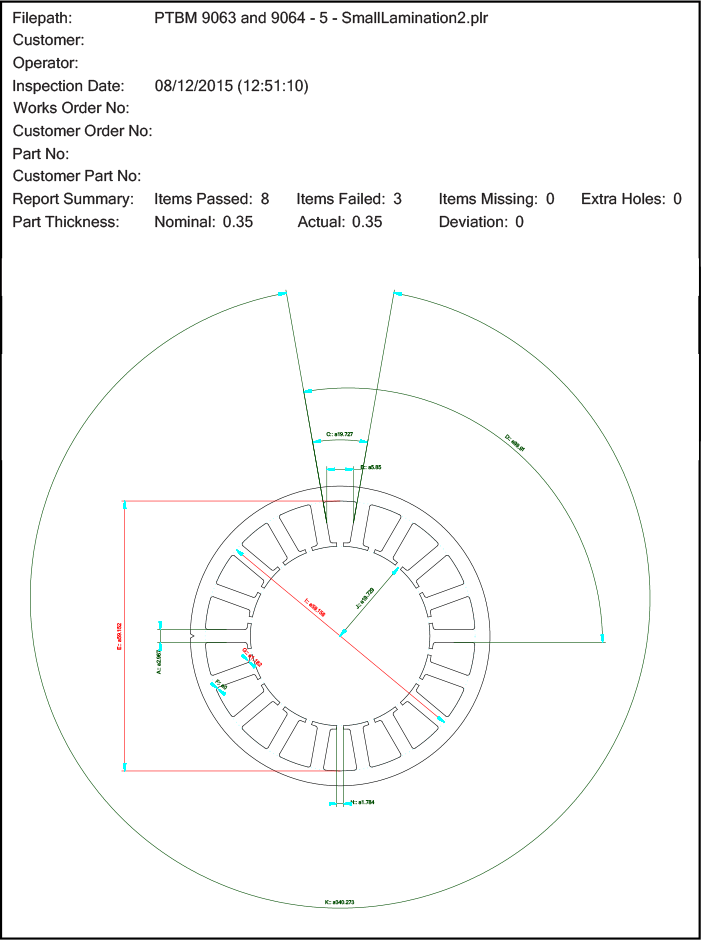
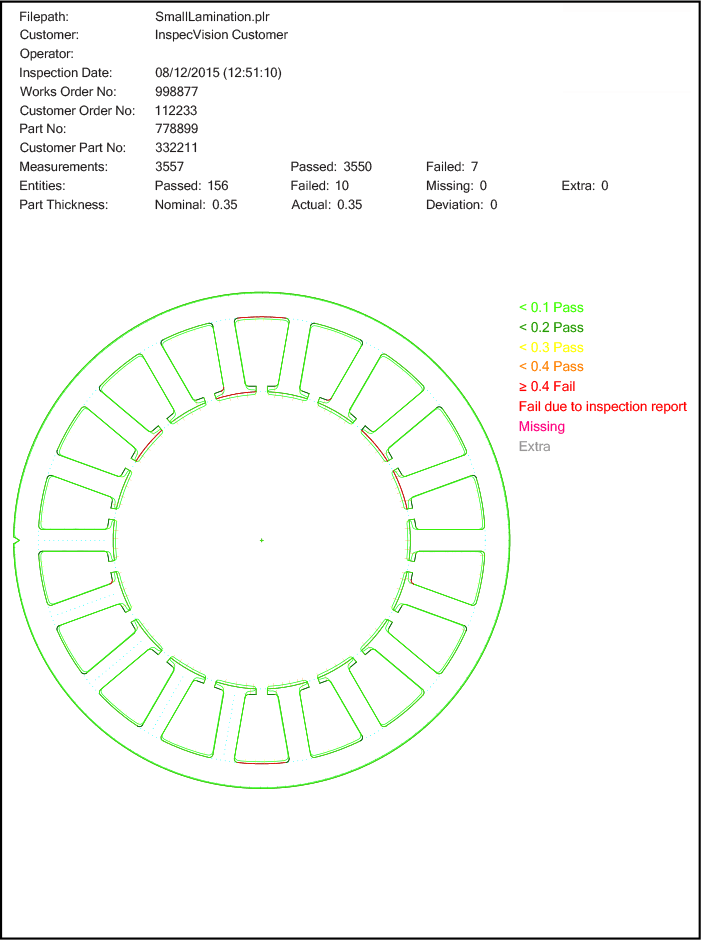
See figures 1, 2 and 3 for a sample Deviation Map, Inspection Report and Inspection Report Diagram for the Lamination example shown throughout this document.
The Planar2D measurement system has a large range of sizes accuracies.
For more information on how InspecVision systems can help you please contact our team at sales@inpsecvision.com.

