Application Example
A sheet metal inspection and reverse engineering solution using the InspecVision Planar2D - the worlds fastest 2D measurement system
Manufacturing sheet metal parts can be particularly difficult. The production cost per component is very low compared with other industries such as metal machining. This drives down the resources available to the quality control process, even though sheet metal parts are often used in the most demanding applications such as aerospace or automotive or in very large production runs, all of which require inspection.
Sheet Metal Inspection Difficulties
When producing small production runs for more mundane applications, a typical sheet metal part is often painted, formed and welded. Finding a missing hole, insert or fold at the end of a just-in- time assembly process can destroy delivery dates. This may result in a cost to the customer that is many thousands of times more than the value of the part. In the world of sheet metal cutting simply providing a replacement part for free will simply not cut it! Even when producing at parts accuracy is not guaranteed.
While the linear axis in laser cutting machines are quite accurate and reliable, intricate designs in tight nests can impart a lot of heat into a relatively small area. This can warp the metal causing problems with subsequent folding. Added to this is the fact that all at sheet metal parts exhibit edge pro les or kerfs, which are often greater than the failure tolerance of the part.
Punching machines while fast and cost effective are dependent on the tooling being loaded correctly and not breaking. The latest generation of punching machines also create forms, louvres and inserts which often perform critical tasks and must not be missing from the final assembly.
The problems get significantly worse when the parts are formed or bent. The bending process is extremely sensitive to changes in hardness and thickness of the metal which can vary between batches creating signi cant changes in spring back. Multiple bends with variable spring back then create cumulative bending errors. Even a press brake with spring back assessment will typically produce bent parts with accuracies and tolerances which are ten times worse than those prior to bending.
Press brakes are also very reliant on operator skill and it is not uncommon for parts to be bent backwards. Incorrect tooling produces errors in the bend radius, and getting the correct k-factor or by material analysis of the bends is a constant struggle. The aforementioned produce bends of the wrong length and therefore incorrectly formed parts.
This is not a comprehensive list of the issues facing sheet metal production but it is enough to demonstrate that faulty 2D & 3D parts are an unfortunate reality. The only way to stop bad parts getting further up the production process is to inspect them.
Existing Inspection Options
Most sheet metal manufacturers have unsuccessfully searched for a system which can inspect sheet metal parts in an operator friendly, cost effective and timely manner.
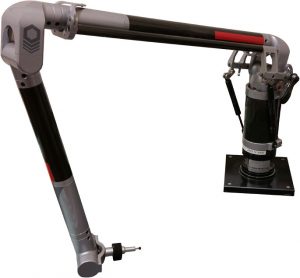
Existing options such as CMMs and CMM arms are not factory floor friendly. They are very sensitive to bumps and can be easily knocked out of calibration. It is quite common for a CMM arm to be recalibrated on day one, dropped on day two and then used for the rest of the year while out of calibration without any means to detect the problem. For reasons such as this, CMMs are usually placed in a metrology area or lab which is far away from the point of production.
Even accurately calibrated CMMs and CMM arms which have a good on paper accuracy are badly affected by the kerf or edge profile of the sheet metal part. In fact CMMs are typically much less accurate than a simple set of calipers when measuring features which are defined by the parts edges, such as distance between holes, hole diameters etc.
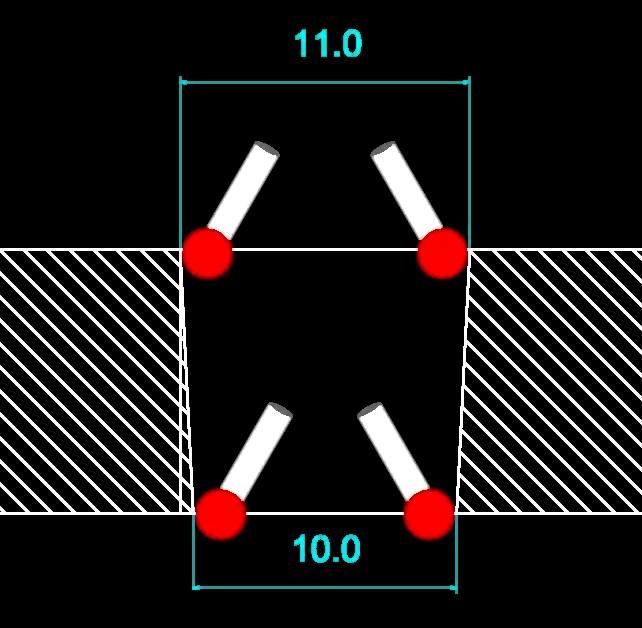
For example figure 2 has a thickness of 10mm with a 5% edge profile. With this setup the diameter of the hole at the top surface is 1mm larger than the diameter at the bottom.
In reality the maximum material condition need not be at the top or bottom surface, it could lie anywhere along the edge of the part. A CMM will need blind luck or the skilled eye of the operator to ensure it acquires measurements at or even near the maximum material condition. This effect can reduce the accuracy of a 1micron CMM to the 1mm variation in the parts edge profile.
CMMs are also extremely slow and difficult to use. This means a skilled operator, a slow throughput and an expensive machine to run. In fact CMMs are so slow that they often take a very limited number of measurements per feature and they are essentially blind in between these measurements.
This precludes full inspection of the part which means they will not spot extra or sometimes missing items such as holes or damage to a parts edge.
Another approach is to use a laser scanner mounted on a CMM. This approach greatly increases the amount of data acquired which will help with spotting missing or extra features, however laser scanners are extremely expensive to purchase, difficult to program and expensive to run. Critically they are also very poor at measuring the location of the edges in sheet metal parts, particularly on thinner gage materials. This is a serious problem as sheet metal parts are primarily defined by their edges.
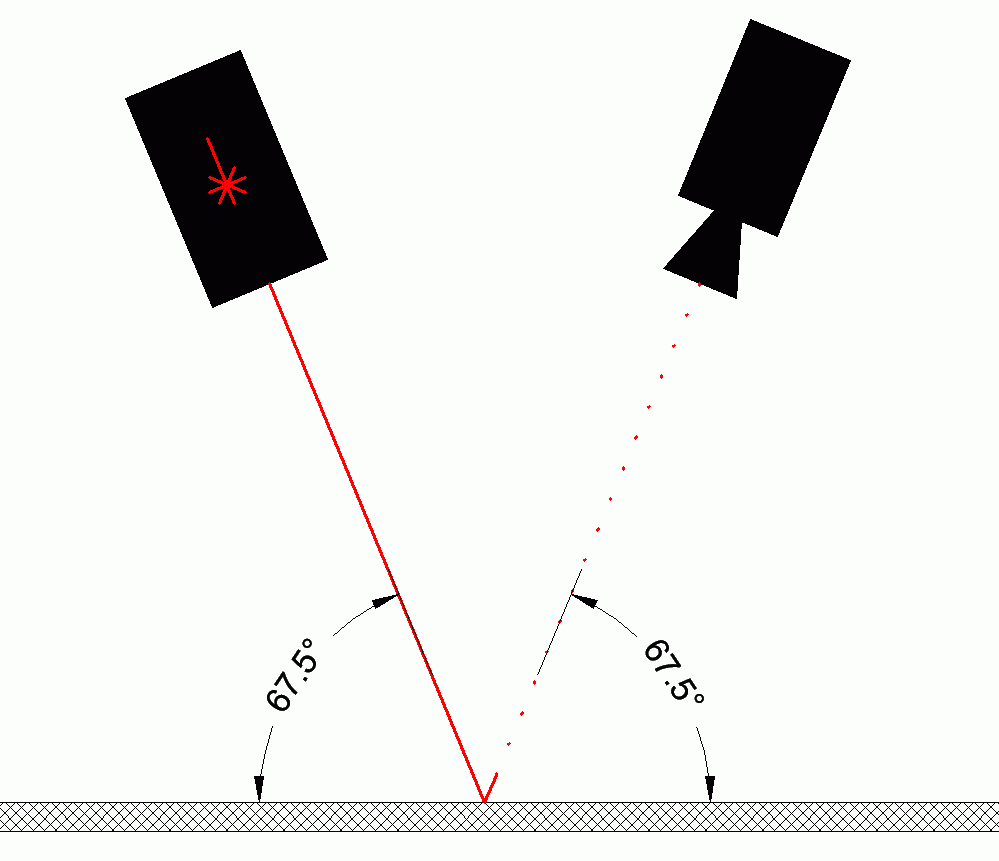
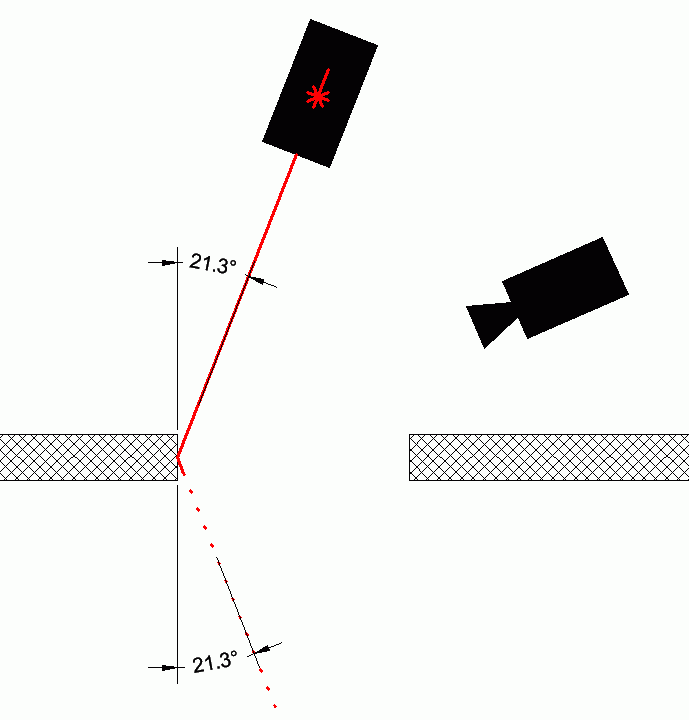
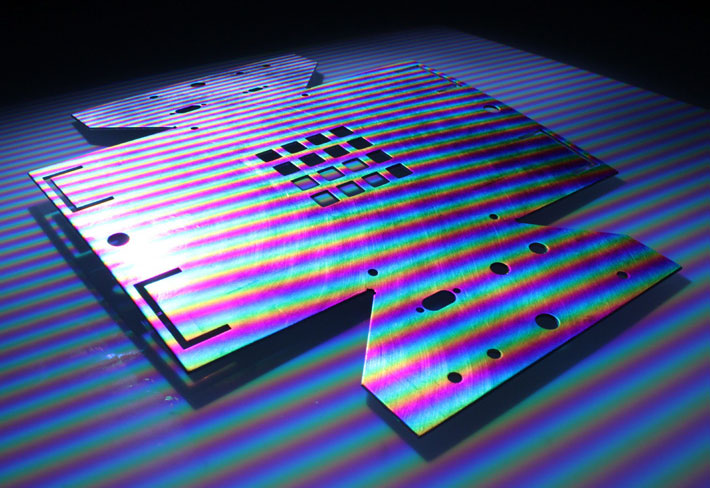
In figure 3 we can see a laser projected onto a part.When light reflects from a surface the angle of incidence is equal to the angle of reflection. When the laser scanner is placed perpendicularly to the surface or edge that is being measured the camera will obtain good reflections from the laser.
However if the laser scanner needs to measure internal edges in a sheet metal part it is not physically possible to place the scanner perpendicularly to the internal edges. The scanner can be at best placed at an angle to the edge which massively reduces the amount of reflected light that the camera will acquire. This can be seen in the figure 4.
This limitation of laser scanning is a well known problem. To help accommodate this limitation many 3D inspection software packages will try and estimate the hole diameter and position from the absence of measurements rather than their presence. However this is clearly far from ideal and estimating the position and size of a feature from the absence of measurements of that feature will always give a vastly inferior result than actually measuring the feature directly.
Other entirely manual systems such as templates, jigs and lofts/ mylars are slow, inflexible, difficult to maintain and not accurate.
An Automated Solution Is Needed
In many sheet metal production facilities the only inspection tools available are low cost calipers, tapes and protractors which are so slow and prone to operator error that they are rarely used.
What is needed is a machine that can completely inspect the shape of a at part in a few seconds and with a single click. The system should live on the factory floor next to the production machine to reduce the time taken to load the part onto the inspection system. The machine should also not be affected by scratches or bumps which are common on the factory floor but if serious trauma does occur the machine should automatically detect this and warn the operator.
The measurement system should not need a temperature controlled environment, and it should automatically measure and compensate for ambient temperature changes. The system should also be capable of programming itself from any dimensions which exist in the CAD file so that the operator does not need to spend any time defining what dimensions to check and which tolerances to use.
Crucially the system should also be capable of inspecting folded or formed parts. Again ease of use is vital and it should be possible to perform a complete inspection of a 3D part with a single click and a relatively unskilled operator.
The Planar2D Solution
The award winning Planar inspection system is the fastest and most automated 2D inspection system in the world. The system can be used for very quickly measuring or reverse engineering parts. The system uses a backlit table and a static high resolution digital camera mounted above the table.
The Planar system is extremely automated. With a single click, or by scanning a barcode the system can complete multiple actions in a matter of seconds. Parts are measured by placing them onto the backlit table and the camera then captures an image of the parts silhouette. This image is then converted into up to 80 million measurements which can then be automatically compared to the CAD file.
The system is non-contact and does not require any jigging or fixtures. This makes it easy to measure flexible materials. The 2D system can also compensate for parts with varying thicknesses, edge profiles and raised sections (gap to table).
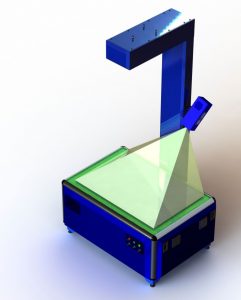
The system can also handle unflat parts and parts with punched forms. These can be measured with the SurfScan option show in figures 5 and 6.
The system automatically compensates for ambient temperature and photogrammetry markers are embedded into the edge of the measuring surface to monitor the status of the machine during every measurement and make small adjustments as required.
Shop Floor Friendly Automated Inspection using the Planar2D
As the system has no moving parts there are no wear items that need maintenance or recalibration. Furthermore the system can automatically detect when it has suffered trauma and will warn the user that recalibration is required.
The table is not affected by vibrations or scratches and cracks on its glass surface and will automatically compensate for changes in ambient temperature. A barcode scanner can also be used to define the CAD file location, part tolerances, material type and thickness, the output location of the reports, alignment type and many other options.
The machine programs itself. The dimensions contained within CAD files can be used to create the inspection report complete with tolerances. If no dimensions exist an inspection report can be automatically generated. The entire system will automatically output and save the reports, including GO/ NO-GO information. The Planar system can automatically convert the dimensions and tolerances in the CAD file into a report. This can completely eliminate setup periods allowing new designs of parts to be inspected with a single click or even zero clicks.
All of these features combine to create a flexible, powerful single (or zero) click inspection system. The system can also reverse engineer 2D parts in a few seconds and is fully retrofittable with full 3D scanning options.
Why You Should Measure in 2D
It is actually quicker to inspect a part in 2D and 3D than to inspect it only in 3D. The 2D system is extremely automated and can completely inspect a parts profile in around 15 seconds with zero programming and without touching the computer.
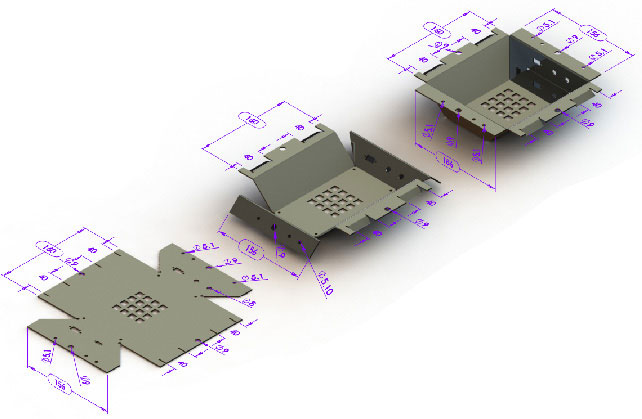
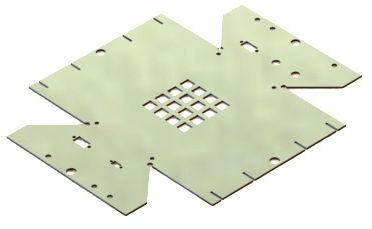
The results are very easy to interpret and most of these inspection features do not change when the part is bent into its 3D shape (see figure 1). So by inspecting a part in 2D the 3D inspection task is reduced by (typically) 60 to 80 percent.
In figure 1 we can see a part in its flat and folded form. Any dimension which does not span a fold line will remain unchanged after the part has been bent. In this example we can see that all of the 3D dimensions can be confirmed at the 2D stage.
Furthermore, 3D inspection is always going to be a more complex task than 2D inspection in both setup and interpretation. Consequently 3D automation is more difficult to achieve and maintain. For example the setup period to create a new inspection program in 3D might take several minutes butin2Ditiscan be completely automated and takes one or two seconds with no input from the operator.
Another advantage of inspecting in 2D rst is of course its ability to catch problems at an earlier stage in the production process.
Planar 2D Inspection Report
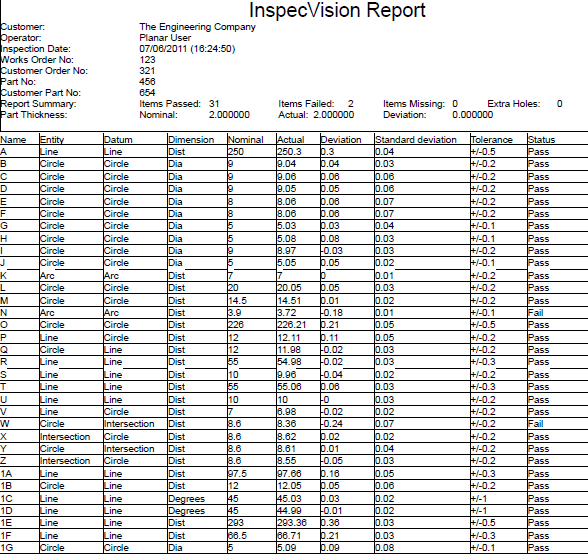
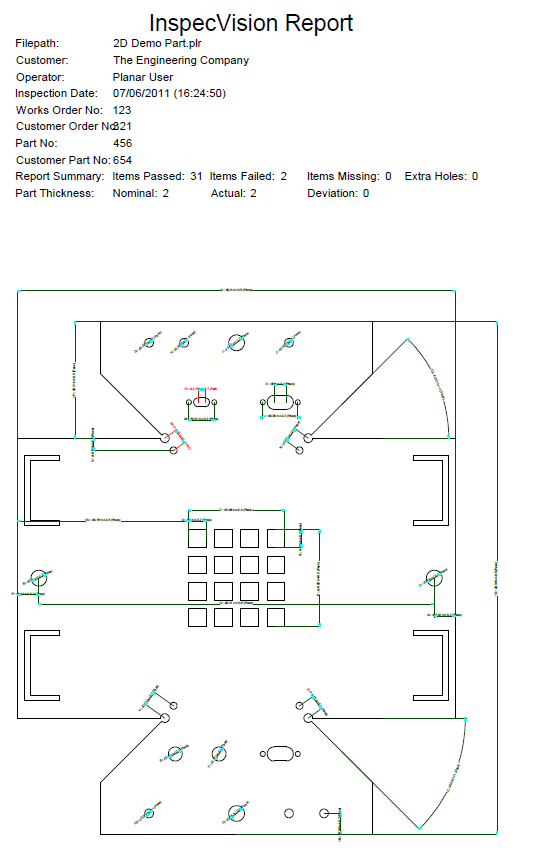
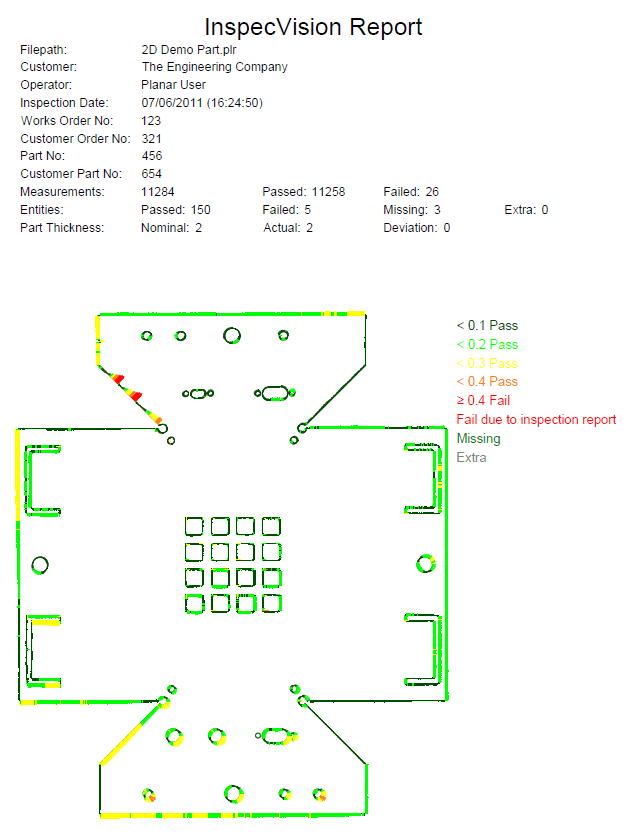
See figures 8, 9 and 10 for a sample Deviation Map, Inspection Report and Inspection Report Diagram for an example sheet metal part.
The Planar2D measurement system has a large range of sizes accuracies.
For more information on how InspecVision systems can help you please contact our team at sales@inpsecvision.com.

