Case Study

Company Profile
Company:Whitwam Precision Components Ltd.
Size: €125M
Location: UK
Machine: Planar P120.50
Whitwam Precision Components Ltd (WPC) specialise in subcontract CNC component manufacture to the Aerospace industry and currently produce around ve thousand components for the aerospace industry every week.
Whitwam works “exclusively as a sub-contractor for larger suppliers within the Aerospace Industry”, they have supplied parts that have been supplied to Airbus, Boeing, Hawker Siddeley, Eclipse Aviation, AIM Engineering and Embraer.
Until 2007, the customers that Whitwam supplied were happy to inspect components on arrival, or provide a calibrated master so that the subcontractor could inspect parts by eye.The latter, although satisfactory, was not ideal as there was a risk of human error, which could lead to a batch of parts being scrapped.
Operations Director, Matthew Whitwam stated that “customers began to demand more detailed inspection processed be implemented”, and Whitwam’s manual methods were not adequate for inspection. This made the purchase of a computerised measuring system to satisfy customer demand a necessity.
“InspecVision measuring process is between two and three times faster than the laser system, irrespective of component complexity.”
— Chris Whitwam, Whitwam Precision Components Ltd.
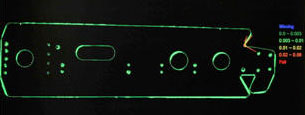
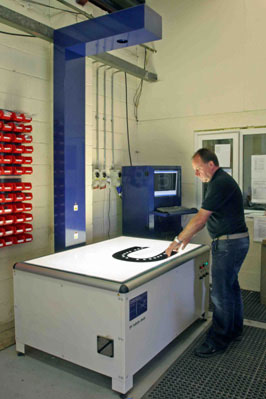
Components are now checked on the Planar machine, which is conveniently “situated on the factory floor close to other machinery”. Measured results from the system are obtained in about 15 seconds and correlated back to the original CAD le already loaded into the machine’s control. Graphically on screen, the measured profile is displayed against a trace of the CAD model, with any out-of-tolerance areas shown in red. Results may be printed out as required and supplied with the parts to the customer.
Mr Whitwam has stated that the Planar machine “has proven to be a valuable asset...the InspecVision measuring process is between two and three times faster than the laser system, irrespective of component complexity,” and notes that the “results are just as accurate and are unaffected by foreign matter on the table.”
He also pointed out that the digital camera-based system costs less than two-thirds the price of a laser scanner. Mr Whitwam states that “previous inspection methods were time consuming, inconsistent and the risk of human error was high...it was very easy to miss important errors or small inaccuracies” but the Planar machine “has provided us with increased opportunities...we are now able to obtain more work”.
“Due to the reliability of the machine we have not had the need to request support often...but support has always been excellent whenever it has been requested.”
— Matthew Whitwam, Operations Director, Whitwam Precision Components Ltd.
An added bonus is that the Planar machine is also able to inspect 3D parts using one of their 3D measurement options, which Mr Whitwam included in his machine’s specification. In addition to inspecting aerospace components that Whitwam produces, the Planar enables them to reverse engineering customer parts for which drawings or electronic data are no longer available. CAD files can be created, from which further parts can be made.
To find out more information about the Planar and how it can help your business; please download our online brochure and contact our sales team at sales@inspecvision.com.


